Google Analytics is a free cloud based software from Google designed to track user behavior on a website or app.
The analytics software shows the practical effects of changes you make to your website, even in real-time. It’s especially helpful in allowing you to create and track goals for your website. Ultimately, if you’re at all interested in improving your website and getting more traffic, Google Analytics can help you do it.

For all of this, I always recommend that you add your website to Google Analytics as soon as possible. Even if you don’t actively check your analytics, you’ll still want to add your website to it ASAP because you can’t retroactively track traffic before you connected Google Analytics.
Let’s talk how to add a website to Google Analytics in 60 seconds.
Add a Website to Google Analytics
Before you can add a website to Google Analytics, you need a free account. Navigate to analytics.google.com and create an account.
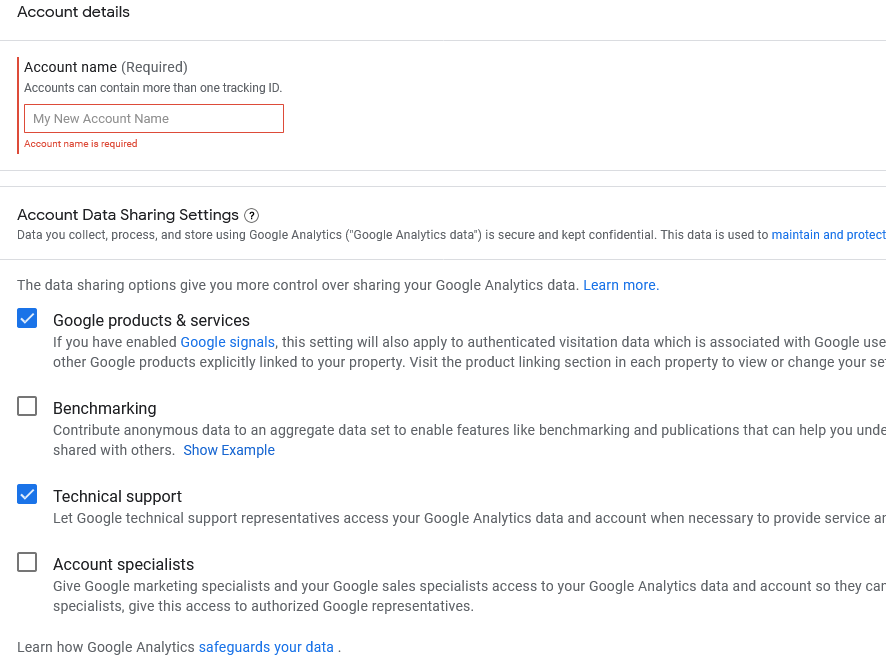
The first thing to do is create an account name. This is the most macro level name; I recommend naming it after your brand.
You then have to specify to Google which data sharing you wish to engage in in the account and data sharing settings. I recommend ticking “Google Products and Services” as this is required to give you access to more in depth tracking.
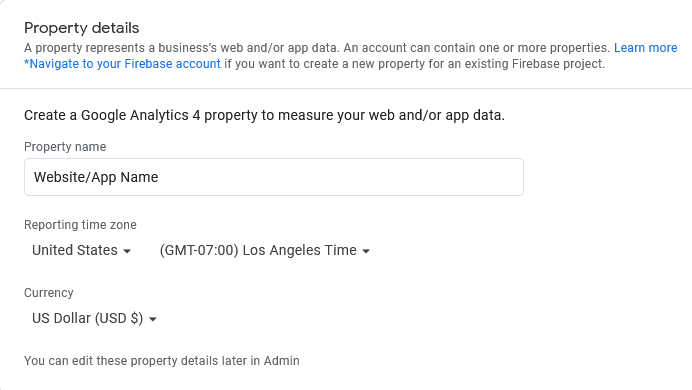
Next, name your property itself. You’re likely going to be tracking your website, so you might name this “My Website” or “(Your Brand) Website”.
You can also specify your time zone and currency, that latter of which is for tracking goal values if you choose to set that up:
Lastly, you can specify your business/brand/site’s industry and indicate how you want to use GA:
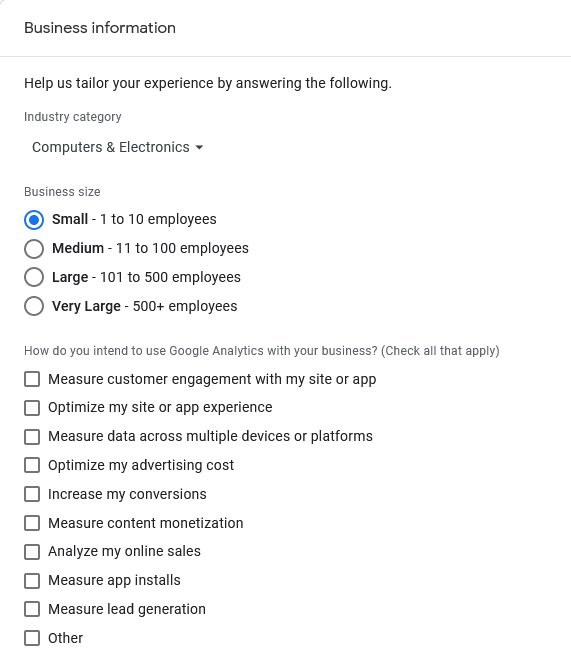
After you submit this, you’ll have to agree to Google’s terms and specify what you want GA to email you about.
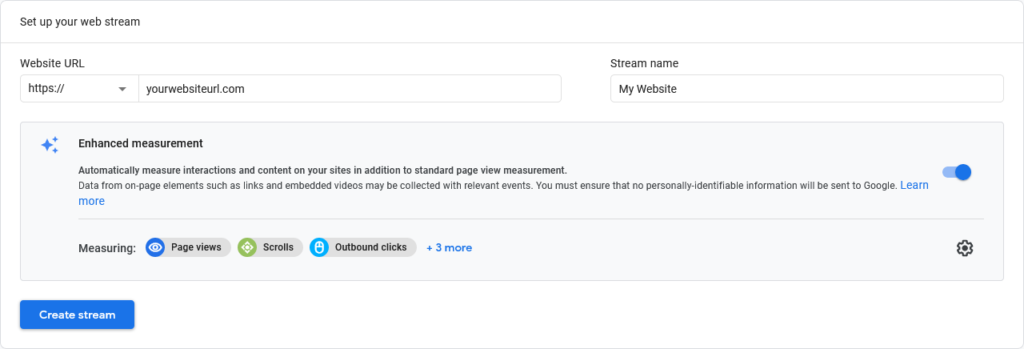
After you’ve gone through these steps, you’ll be dropped in the “Data Stream” tab in GA and prompted to set up your first data stream. This essentially just means connecting a website or app to your GA account to track.

Select “Web” as the platform to track your website and enter your URL (specifying HTTP or HTTPS on the left) and name this specific data stream. This is the last name, I promise, so just name it “My Website” again. The different levels of granularity in naming apply to larger businesses which are tracking multiple properties. Here we just want to track our website:
Now we just need to add a website to Google Analytics. After clicking “create stream”, locate the “Tagging Instructions” section and click the arrow to expand the “Global Site Tag” section.
This gives you the code we need to add a website to Google Analytics (connecting the two):
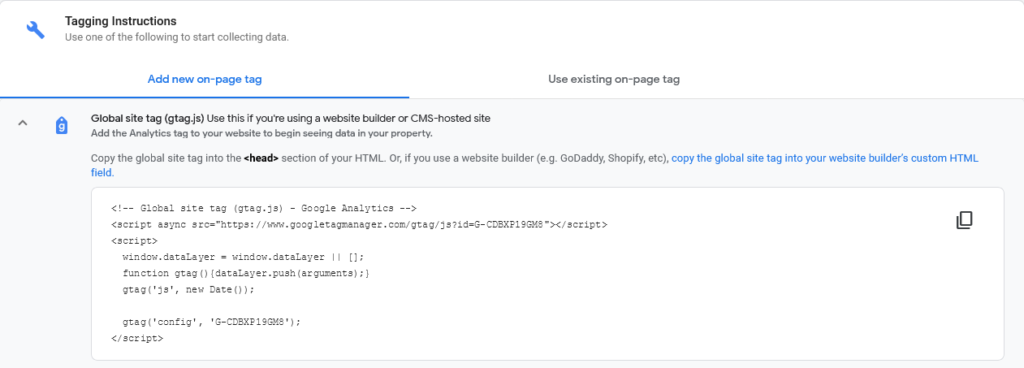
There are two ways to add the gtag.js to your website:
1 – You can manually copy and paste this into the head section of every page of your website (or an equivalent php page, i.e. “header.php”). Simply copy and paste the code exactly as GA presents it to you into the head section to track that page.
2 – You can use a plugin. If you’re using WP, I like the MonsterInsights plugin as it allows you to connect your website to Google Analytics with a couple of clicks. Simply install and activate the plugin on your website. Then select “Connect MonsterInsights” from its settings tab. This will prompt you to select your Google account associated with your GA account. Agree to its access terms, and pick the profile for the account you want to track. You should have only option if this is a new account, the one you just set up:
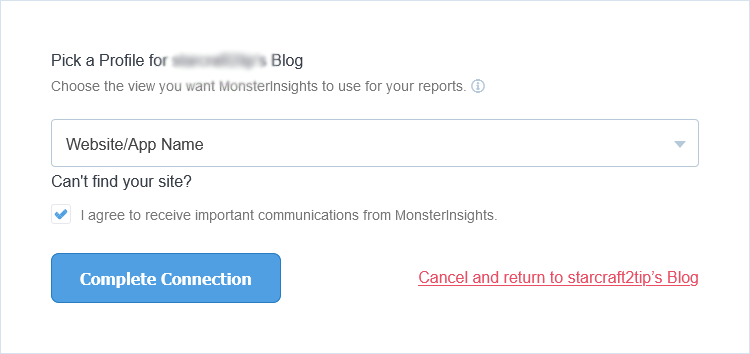
The added benefit of using this plugin is that it provides a snapshot of your analytics within your WP dashboard without having to go to GA itself.
After a day or so you should begin seeing data being tracked from that stream. You can see stats about the people coming to your website (including real-time) and more importantly begin setting up goals for your site.
Setting up goals helps condition you to strive to improve your website and the content you create with a clear purpose in mind.
I’ll talk more about setting up goals in the future, but once set up, GA will provide insights as to how you can better achieve those goals.
But for now, you’ve successfully added a website to Google Analytics, so congrats!
Enjoy seeing the stats which represent the fruits of your labor from making all of that great content!
One last thing to mention is that I recommend connecting your new analytics account to a Google Search Console account to get additional information (see how to connect Google Search Console to Google Analytics for more information as well as information on how to add website to Search Console).
Pingback: How to Add Website to Google Search Console - Angry SEOer
Pingback: How to Connect Google Search Console to Google Analytics - Angry SEOer
Pingback: How to Find Advertisers For Your Website - Angry SEOer
Pingback: 6 Types of User Engagement in Google Analytics That Are Killing You - Angry SEOer